
A colorful French manicure, right at your fingertips…
Welcome to the last installment of our 3-part series featuring the intricate and delicious handiwork of nail artist Betina Goldstein. (Here are parts one and two, if you missed!)
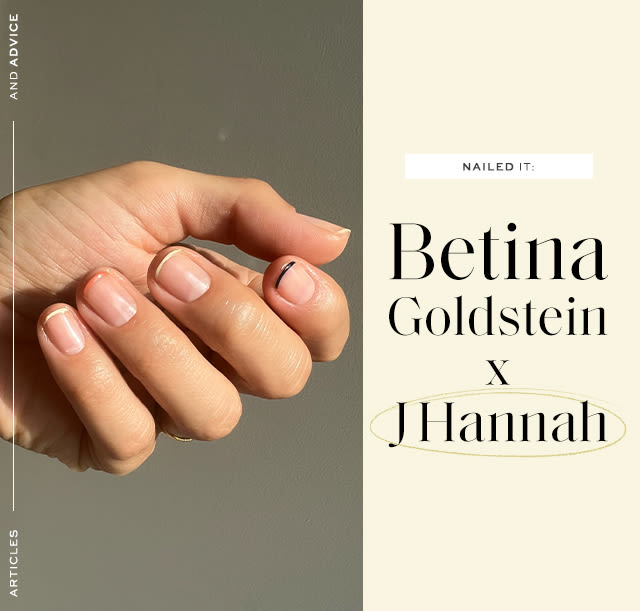
BETINA GOLDSTEIN’S MULTICOLOR MICRO FRENCH LOOK
BETINA GOLDSTEIN’S MULTICOLOR MICRO FRENCH LOOK
Step 1: Apply base coat to all nails and allow to dry.
Step 2: Using a thin brush tool, start from the corner of your nail and follow along your free edge. Then repeat on the opposite corner, meeting in the middle.
Tip: Use a palette to drop a bit of polish and coat your nail art brush. Make sure it is evenly coated. If the polish dries, reapply a new drop of polish to your palette. This will help keep your strokes even.
Step 3: Repeat on each nail, alternating colors.
Step 4: Apply Top Coat to the tips of your nails.
Tip: This not only smoothes out any bumps, but it also prevents your design from smudging when you apply top coat to your entire nail.
Step 5: Apply Top Coat.
Tip: If you do not have a thin brush tool or feel comfortable using one, apply peel-off skin protector to the skin surrounding your free edge. Then you can use the corner of the brush from the bottle to swipe along your free edge, then peel off the skin protector.
Tip: If you do not have access to skin protector, simply add a bit of hand cream to your skin, apply polish and, going in with a cleanup brush or Q Tip dipped in remover, remove the polish from your skin.
Hand cream will help prevent your skin from staining, and will make cleanup a lot easier.
More To Read
6/3/2022 | NAILED IT
Summer Nail Art with Betina Goldstein X Loud Lacquer
“Shell” we begin?
WE TRIED IT
A Fragrance That Smells Great On…
Absolutely everyone.
NAILED IT
Your Obligatory Fave New Nail Art Alert
Courtesy of Betina Goldstein and Sundays polish…